
Framing and insulating a sauna are two critical steps to building your own custom sauna. Whether you’re opting to save a bit of your budget by doing your own sauna framing and insulation, or building the entire sauna yourself, we’ve written this to help explain exactly how to do this yourself.
If, upon reading this, you realize you are totally capable of doing your own framing and insulating of your sauna, consider giving us a call. Many of our clients choose to do their own framing and insulation while having us custom cut a DIY sauna kit for their space.
Our Custom DIY Sauna Kits Include:
- Sauna Heater and Rocks
- Tongue and Groove Interior Material
- Vapor Barrier
- Pre Built Benches
- Trim and corner cove moulding
- Pre Hung Sauna Door of your choice
The video below shows our step by step process building a custom sauna inside a pre-framed space.
Why Framing and Insulating A Sauna Is So Important
The first step to building your own sauna after site selection is the framing. Of course, by this point you will have considered things such as whether or not you’ll have a drain in your sauna, a shower in the sauna, the size of the sauna, and the ceiling height. If you have not yet thought about these things, we highly recommend you do.
Great care should be taken when framing and insulating saunas because just like a house, modifying this structure later involves a significant amount of work and cost. You’ll want a sturdy frame to your sauna, as this provides the supports for your benches and holds the entire room together. Depending on the location of your sauna, you may not have to frame all 4 walls.
Choosing the correct location for your sauna can have a reasonable impact on the amount of time and money you invest into your build. This is another reason why unfinished areas of the basement, or areas near utility rooms in homes are so popular. These areas often times feature exposed studs, drains, and easy access to power supply needed for a sauna.
Steps To Framing A Sauna
- Take measurements for dimensions, ensure it’s square and snap lines
- Mark door location for rough opening
- Remove any existing drywall
- Frame the walls using 2x4s
- Determine vertical or horizontal tongue and groove and if vertical, add furring strips
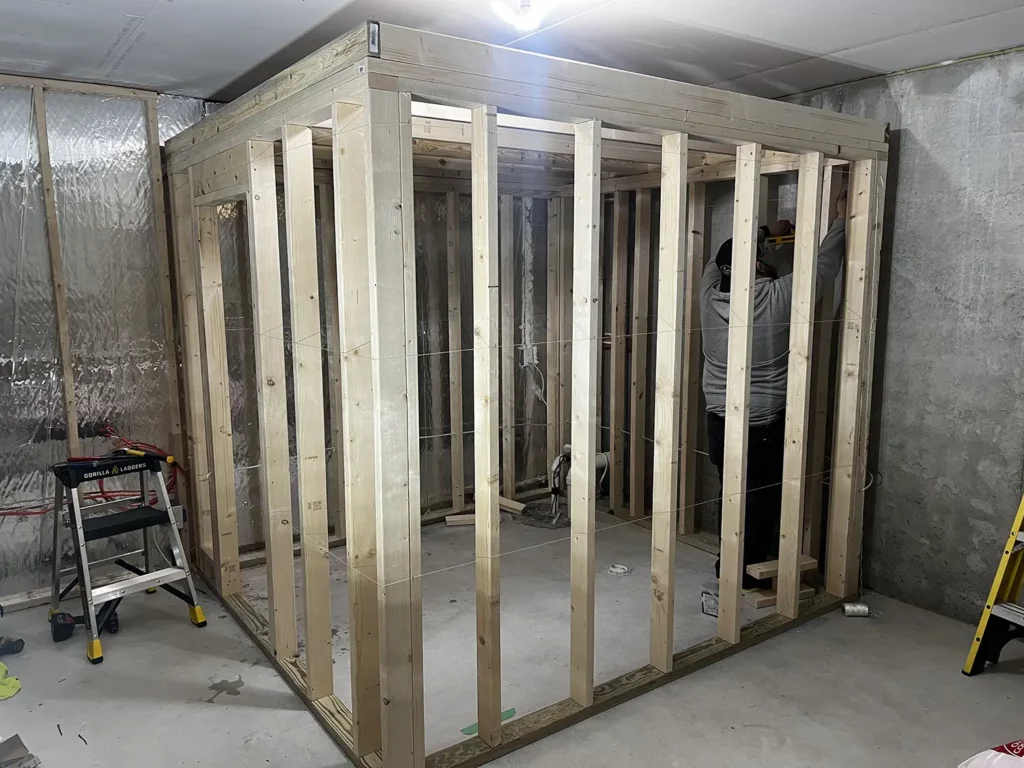
The photo below shows one of our custom built saunas being framed. You’ll notice the ceiling framed below the existing ceiling. This is because of the 7′ ceiling height inside this sauna.
Framing a sauna is no different than framing any building and the ideal framing material for a sauna is a wood 2×4. While it can be done with 2×2’s, they’re just not as structurally strong as a 2×4 and should only be used when space is of concern. If you are framing with 2×2 material, we suggest using 2×4’s and simply flip them to run the opposite way.
Typical stud distance for sauna framing is 16″ on center. This is standard in most houses and it provides adequate support for the sauna room itself. To calculate your number of 2×4’s needed to frame a sauna simply take the length in inches, divide by 16 and add 6. You’ll need two extra 2×4’s for each end of the wall, as well as one for the top and bottom.
Getting ready to start framing your sauna
You’ll first want to take measurements for the area your sauna will be built. You’ve likely chosen the size of your sauna, as well as the sauna ceiling height, but if you haven’t, do so now. If you want it as big and as economical as possible, an 8×8 sauna is the best size. The reason for this is that most of the sauna wood packages you’ll find come in 8′ lengths as standard.
The most important step in framing anything is ensuring the space is square. Simply framing a couple walls, standing them up and eyeballing it will only cause problems later on. The easiest way to ensure your sauna space will be square is to make marks on the ground and taking crossing measurements. If the area is square, these measurements will follow the Pythagorean theorem.
Marking the door location is critical, as you’ll need to frame in a header and the correct supports to ensure your door holds true to square for the life of the sauna. Framing in a rough opening for your sauna door isn’t hard, but it’s one of the more important parts of sauna framing.
If you are ordering your sauna door from us, give us a call prior for help determining your rough opening. All of our sauna doors are custom built for your space, pre-hung on a jamb to your exact width.
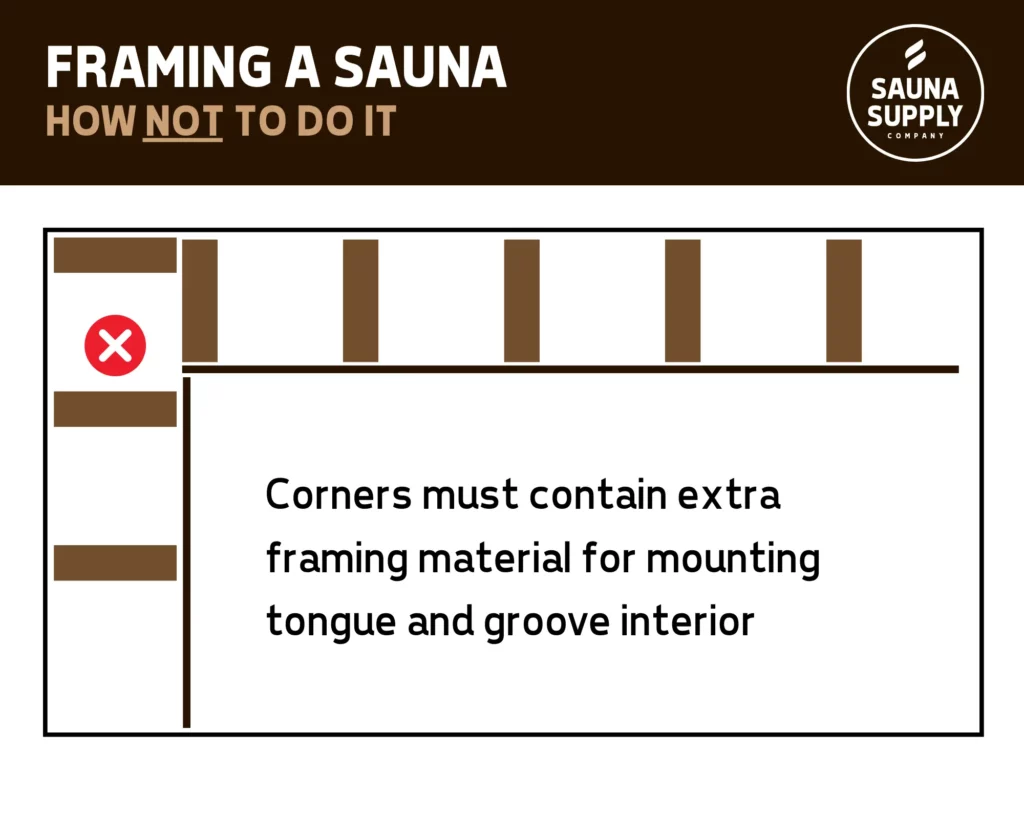
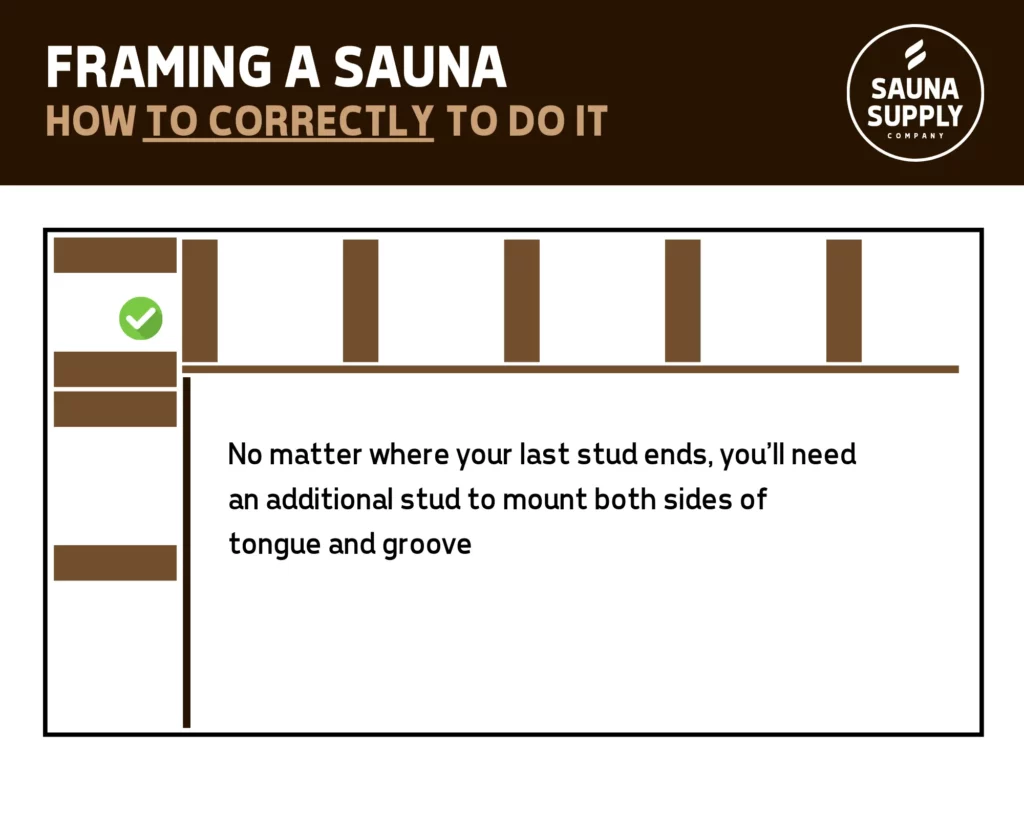
Framing Corners of the Sauna
If you’ve ever framed a wall before, you know that following 16″ on center will likely leave you with gaps near the corners. You’ll need to add extra studs here to ensure that you have a secure location to mount your tongue and groove to when finishing out the sauna.
The first example below shows how not to do this. As you can see in the photo, the tongue and groove interior has a secure location for mounting on the top wall, but nothing on the second wall.
The next photo below shows the correct way to do this. You’ll need to add in an extra stud for properly securing the second wall of tongue and groove, making sure that both end up squarely in the corner with minimal or zero gap between them.
Please note that in these example diagrams, this is not to scale. You’ll want to make sure all framed walls are securely tied together using your framing nailer and that you have adequate space to securely adhere all ends of interior tongue and groove wood to a stud.
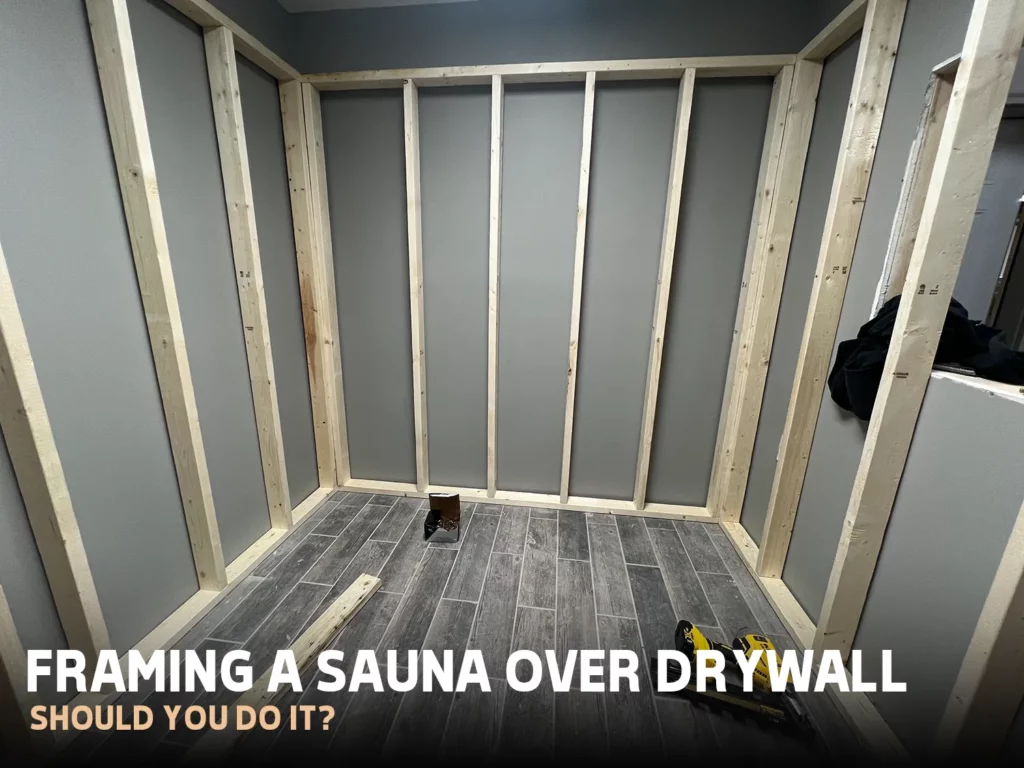
Framing A Sauna Over Drywall, should you do it?
As a general rule of thumb, we do not recommend framing over existing drywall when building a sauna. It adds cost, and reduces the size of the room. Now, for the sake of argument and photos, we did exactly this in our office sauna.
Advantages of framing saunas over drywall
- Saves time of removing drywall
- Makes finish work easier as less drywall is required after the build
Reasons you shouldn’t frame your sauna over drywall
- Makes supplying electrical power to the sauna more difficult
- Your sauna may lose up to 8″ of width, depth, or both
Remove any existing drywall prior to framing your sauna. To some this is very obvious, but if you are building against a wall that has drywall on it, you’ll want access to the studs behind it. One option is to skip this, simply framing right in front of the drywall.
There are two downsides to doing it this way. First, you’ll lose 3.5″ of space and after you hang your tongue and groove, up to 3/4″ additional. Depending on the thickness of your drywall, add another 1/2″ to 5/8″. Seems minor, but in a sauna that’s smaller in size, this makes a huge difference.
As an example of how to frame inside of existing walls, here’s what we did in our own custom office sauna.
Once your sauna has been framed, if you are using vertically mounted tongue and groove, you will need to install furring strips.
Typically, we do not vertically mount tongue and groove material unless the sauna has a wall width that is longer than our max size board. Furring strips add minimal extra time, but significantly more effort.
How to Install Sauna Insulation
Of building a sauna yourself, the framing is without question the hardest part of the entire build. And for those who have a bit of experience in 2×4 stud framing, this should be welcome news!
Next, you’ll need to install insulation. In the photo below, we show a sauna that we recently built just prior to mounting the Nordic Spruce tongue and groove interior.
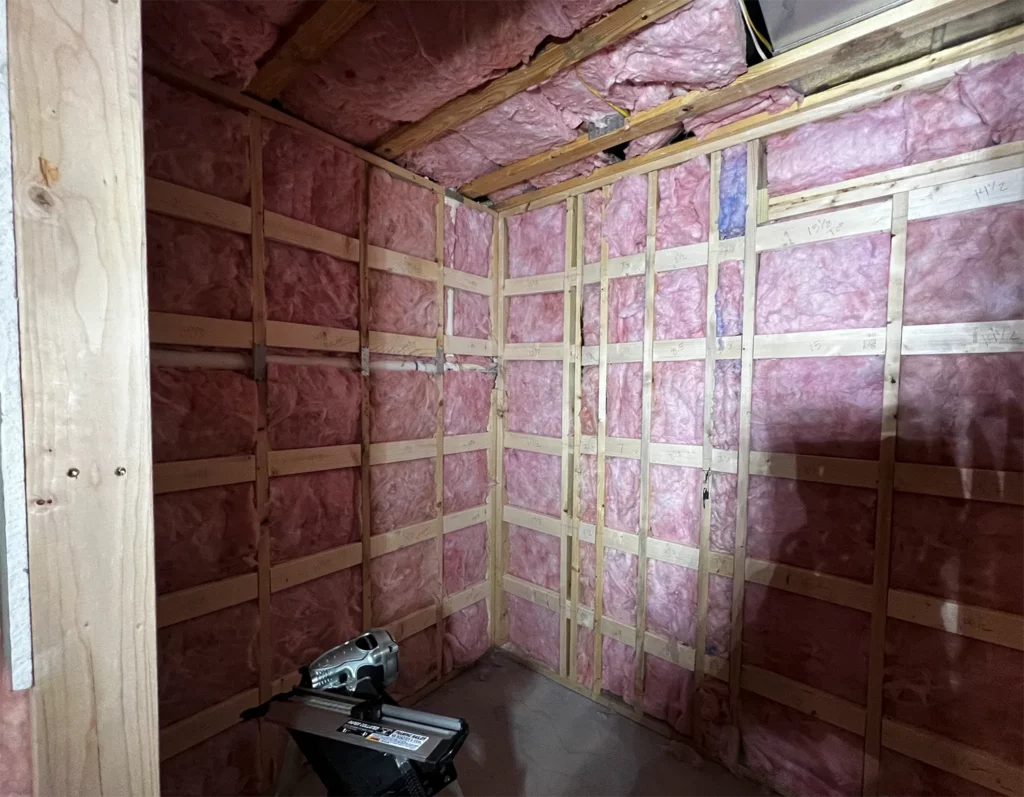
The photo above shows the sauna interior framed, with blocking added. The reason blocking is added between each stud cavity here is because the tongue and groove will be vertically mounted at the owners request.
It is far easier to mount tongue and groove horizontally, as studs run North and South, vertically. If you choose to mount your tongue and groove vertically, keep in mind that you will need to add blocking or furring strips to complete this.
Blocking vs Furring
Blocking has an advantage over furring in that it is technically stronger than a furring strip. It’s more time consuming, more costly, but it is done correctly. Furring strips will work just fine and many people build their saunas with vertical tongue and groove using furring strips.
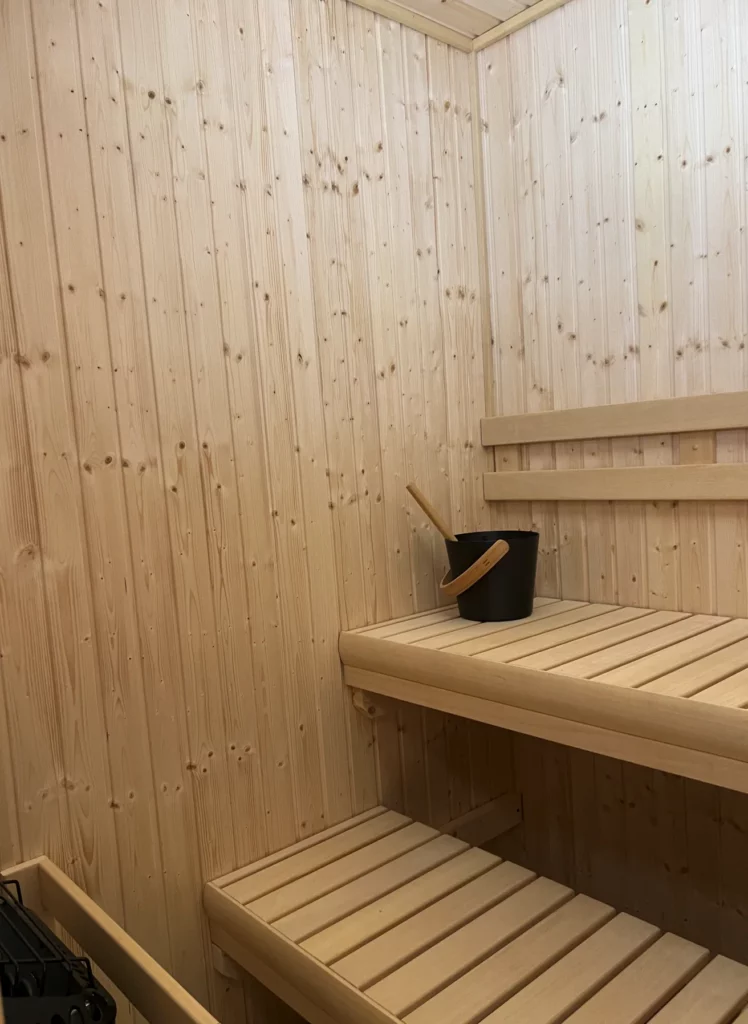
So we don’t leave you hanging, here is a photo of this sauna in it’s completed state. Note, the vertically mounted tongue and groove.
How To Own A Sauna Without Framing And Insulating
It’s entirely possible to have a traditional Finnish sauna, or an infrared sauna, in your home without doing any framing or insulating of the room. We offer completely custom built modular saunas with a false floor that allow you to place a sauna in any space within your home. Our modular saunas come in a variety of standard options, or the ability to do it fully custom to your exact specs.
Another benefit to our panel built modular sauna kits is that they are simple to assemble and move in the future. You’ll have your sauna up and running in a single day, as compared to weeks or even months.
Below is an example of a modular sauna we custom built using Clear Western Red Cedar.
This sauna features a false floor and is located in our clients 4 season porch. There is no drain, as with a false floor in your sauna there is no drain required. This is a traditional Finnish sauna that runs off 240 volt power. For more photos of this project, check out it’s project page.
![]()